
PORTAL LOGIN(opens in a new window)
Not registered for portal? Please contact the portal administrator in your organisation to arrange access.
You can make a claim on an existing or past policy via the VMIA portal by clicking on the ‘Make a claim’ tile on the portal homepage and providing all the relevant information regarding the claim. You will receive an automated email from VMIA once you submit the claim.
Note: You can enable privacy on a claim, allowing you to restrict access to the claim to specific users in your organisation.
Note: Only certain account types have permissions to lodge claims on the portal. For more information, see the section on VMIA Portal Account Types.

Step 1. Click the ‘Make a claim’ tile on the portal homepage.
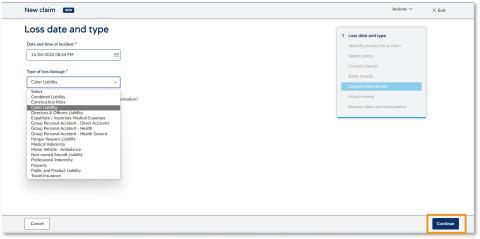
Step 2. Enter the date of loss from the date selector and select the claim type that you wish to make from the ‘Type of loss/damage’ drop-down.
Step 3. Select ‘Continue’.
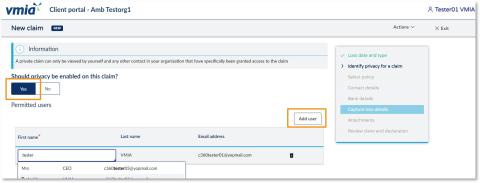
Step 4. Select ‘Yes’ if you wish to enable privacy on the claim. A ‘Permitted users’ section will appear where you can add other users to the private claim. Multiple users can be added or removed on a private claim.
*If you do not wish to enable privacy on the claim, ensure ‘No’ is selected and skip to Step 8.
Step 5. To allow other users to access the private claim, click ‘Add user’.
Note: A private claim allows you to restrict access to other users within your organisation. VMIA claim handlers can also view and edit privacy permissions on claims, if required.
Note: Only the initiator of the claim will receive any automated or manual emails sent from the VMIA portal.
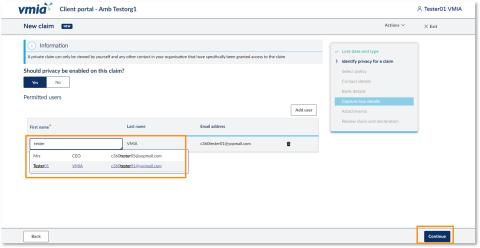
Step 6. Begin typing the user’s name in the textbox and select the correct user from the drop-down list.
Step 7. Click ‘Continue’.
Note: All permitted users (i.e., users who have been allocated access to the private claim) can add or remove other users.
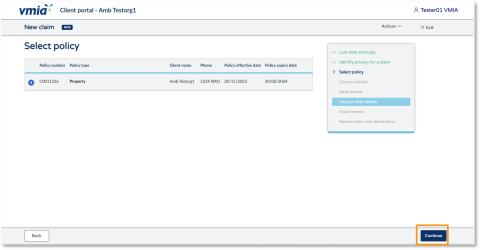
Step 8. Select the policy that you wish to claim on by clicking the checkbox on the left-hand side. Click ‘Continue’ on the bottom right.
Step 9. Click ‘Continue’.
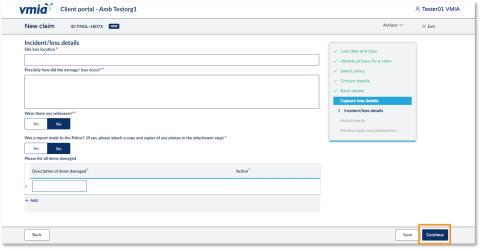
Step 10. Provide all the required information about the claim in the ‘Incident/loss details’ section.
Note: All fields marked with an * are mandatory and must be filled out before you can submit the claim. If you need to make a change, you can go back to previous pages using the right-hand side navigation or the ‘Back’ button in the bottom left corner.
Step 11. Select ‘Step 11. Select ‘Continue’.
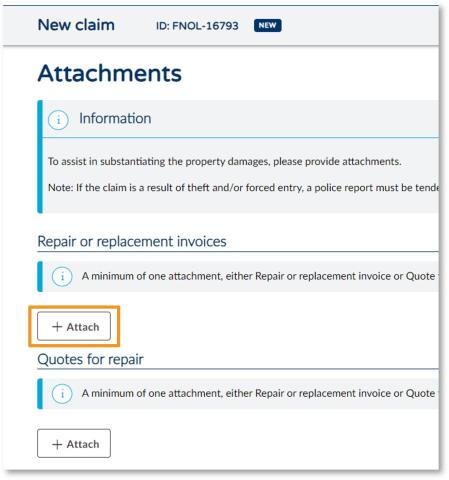
Step 12. To attach relevant documents to the claim, click ‘+ Attach’ under the relevant heading.
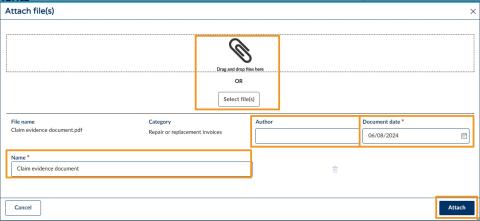
Step 13. Either drag-and-drop or click ‘Select file(s)’ to browse for files from your computer.
Tip: You can select multiple documents at a time by holding the Ctrl button while you select files.Step 14. Once you attach documents, you must enter the document date (the date the attachment was written, not the current date). You have the option to include the author (the person who authored the file), and to rename the file if you wish in the ‘Name’ field.
Step 15. Select ‘Attach’ and then ‘Continue’.
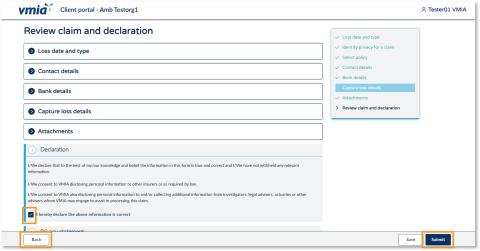
Step 16. To complete the claim, read the declaration and select the checkbox to declare you understand.
Tip: If you would like to review your claim details before you submit the claim, click the fields above the declaration to see your responses.
Step 17. Click ‘Submit’. You will receive an automated email from VMIA once you submit the claim.
Tip: You can return to previous sections and make changes by clicking the ‘Back’ button.

Tip: If you wish to save your claim without submitting it, click ‘Save’ and then ‘Exit’.
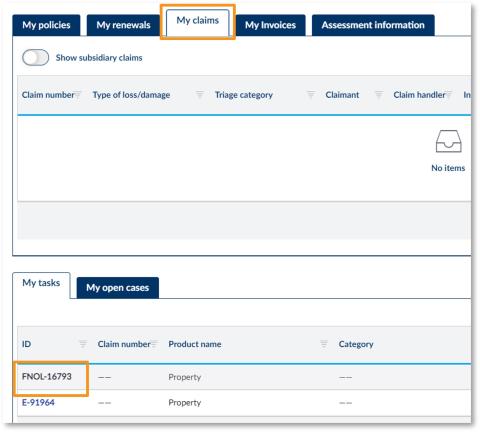
Note: To locate your saved claim, navigate to the ‘My claims’ tab on the homepage and look for the relevant claim reference ID in the ‘ID’ column.
See our short video that works through these steps.
Updated